Fixing Altera USB-Blaster “Hardware not attached” on CH552G Clones
Fixing a cheap CH552G Altera USB-Blaster clone that shows “Hardware not attached” in jtagconfig by flashing working CH55x USB-Blaster firmware.
I bought an Altera MAX II CPLD board and a cheap Altera USB-Blaster clone. The programmer was detected by Quartus and by jtagconfig, but it could not read the JTAG chain. The error was:
Unable to read device chain - Hardware not attached
In my case, the problem was not the cable, the CPLD board, Quartus, Linux, or the JTAG pinout. The problem was the firmware inside the USB-Blaster clone.
Quick fix
If your programmer is based on a CH552G / CH55x MCU and jtagconfig shows this:
jtagconfig
1) USB-Blaster [5-1.3]
  Unable to read device chain - Hardware not attached
then try flashing this firmware: CH55x-USB-Blaster by dougg3
After flashing that firmware, my Altera MAX II EPM240 was detected correctly:
jtagconfig
1) USB-Blaster [1-2]
  020A10DD   EPM240
The USB-Blaster clone I had
My programmer was a Altera USB-Blaster clone based on a CH552G MCU.
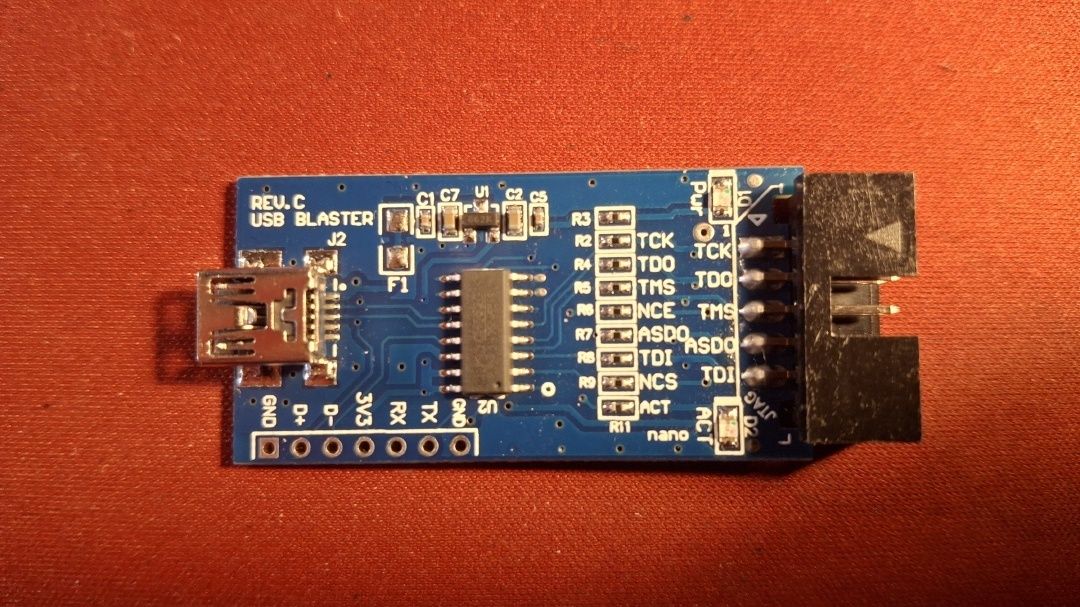
It looked normal, and Linux detected it as a USB-Blaster. Quartus also saw it. But programming did not work.
The original problem
In Quartus, the programmer looked like it was frozen. Nothing useful happened. When I tried to check it manually with jtagconfig, I got this:
jtagconfig
1) USB-Blaster [5-1.3]
  Unable to read device chain - Hardware not attached
The important part is this line:
Unable to read device chain - Hardware not attached
That message made me think the problem was probably wiring, power, or the CPLD board. It was not.
Things I tried first
Before finding the real fix, I tried a lot of useless debugging. I tried:
- different power-up sequences
- making my own ribbon cable
- checking the ribbon cable pinout
- manually wiring the needed JTAG connections
- probing the JTAG lines with an oscilloscope
- checking if the CPLD board was powered correctly
Nothing fixed it.
At that point I was not sure whether the problem was:
- the Altera MAX II board
- the USB-Blaster clone
- the ribbon cable
- Linux permissions
- bad JTAG wiring
The rabbit hole
I found this project, which implements an Altera USB-Blaster using a Raspberry Pi Pico: pico-usb-blaster
Unfortunately, I did not have a Pico.
I also found that the ESP32-S3 supports TinyUSB, so I started making my own USB-Blaster-like version for ESP32-S3. That also did not solve the problem.
At this point, I was almost ready to just buy a new MAX II board and a new programmer.
Finding the real fix
While looking for another programmer, I found one that looked more promising because it had more than just one MCU on the PCB. Under that product, there were a few reviews. Most of them were bad, but one 5-star review mentioned this GitHub repo: CH55x-USB-Blaster
I had already seen that repo earlier, but I ignored it because I thought I was doing something wrong. I did not believe the firmware inside the clone programmer itself was broken. That was a mistake. I mean the whole point of the device is to work… So how can there be a programmer which doesn’t work and has faulty firmware?
There is also a very useful blog post about the same kind of broken USB-Blaster clone here: Fixing a knockoff Altera USB-Blaster that never worked
Full fix
I cloned the repo and then installed the required sdcc, make and the programming tool ch55xtool
git clone https://github.com/dougg3/CH55x-USB-Blaster.git

yay -S make sdcc

python3 -mpip install ch55xtool
Then it was time to build the firmware.
cd CH55x-USB-Blaster
make
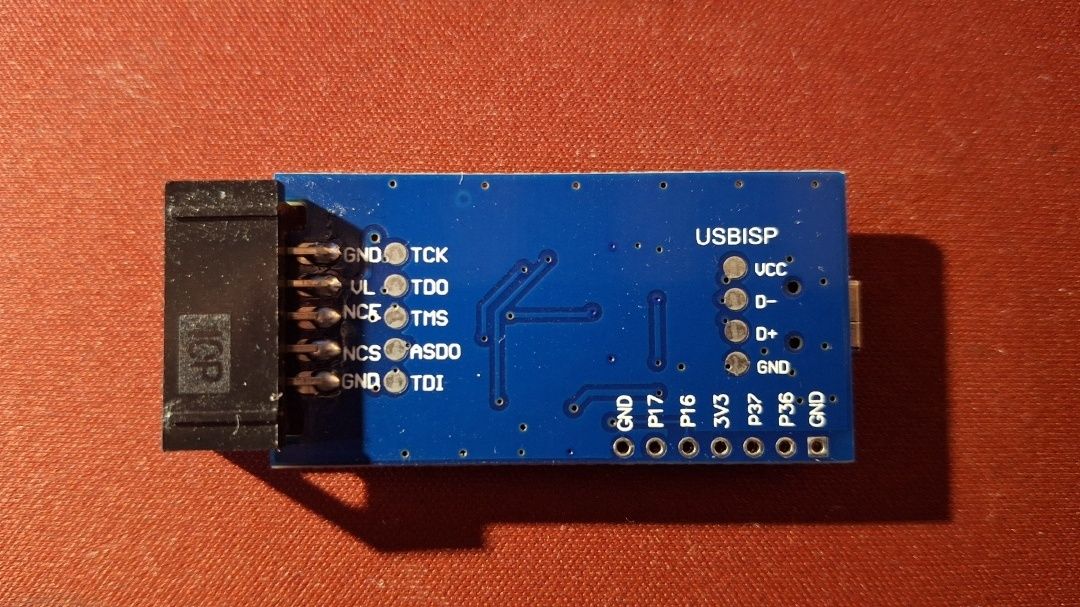
After the successful build stage we have to first put it into bootloader mode by first connecting D+ and 3.3 V on the programmer board and then connecting the USB cable (The pinns needs the be connected before powering the device).
The output of lsusb was promising, I saw the device WinChipHead instead of Altera Blaster:
lsusb
Bus 001 Device 010: ID 4348:55e0 WinChipHead
Flashing command
ch55xtool -f usb_blaster.bin
Failed to get device, please check your libusb installation.
Unfortunately, it still didn’t work. But I didn’t lose hope because I have a lot of experience with USB not working because of Linux permissions.
So I installed ch55xtool for root:
sudo python3 -mpip install --break-system-packages ch55xtool
And then I ran it with sudo:
sudo /usr/bin/ch55xtool -f usb_blaster.bin
Found CH552 with SubId:17
BTVER:02.50
UID:0B-26-00-00-00-00-00-00
Erasing chip flash. Done.
Flashing chip. Done.
Finalize communication. Done.
And yes, this time it worked.
And the output of jtagconfig?
jtagconfig
1) USB-Blaster [1-2]
  020A10DD   EPM240
Yes, it works. Finally!